


It takes as little as 7 minutes to make customized frozen pops with the Zoku Quick Pop Maker. Follow these instructions and tips for creating treats the whole family will enjoy.
Freeze the Quick Pop Maker
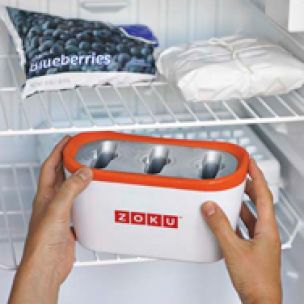
Make sure the cavities are completely dry, then place the Quick Pop Maker in the freezer for 24 hours.
Insert Sticks
Remove the Quick Pop Maker from the freezer and shake gently to make sure it’s completely frozen. If you don’t hear or feel any liquid movement, your Quick Pop Maker is ready.
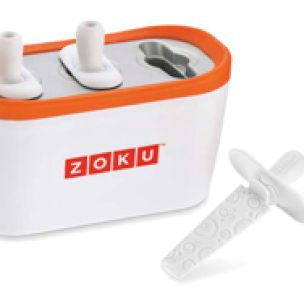
Position the pop sticks in the mold cavities, lining up the tabs on the sticks with the notch as shown.
Pour in Juice
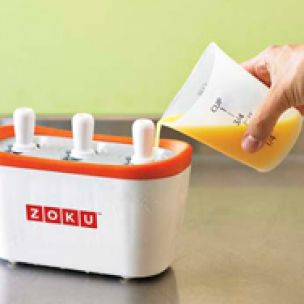
Slowly pour chilled juice into the Quick Pop Maker’s mold cavities, stopping just before the fill line. The juice will expand as it freezes, so it’s best to fill a little below the line. Chilled juice will result in faster Quick Pops. Now watch it freeze!
Remove and Enjoy
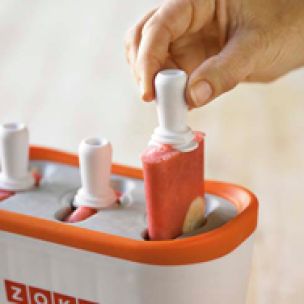
When the top of the Quick Pop is visibly frozen or slushy in the center (after 7 to 20 minutes), place the Super Tool over the handle of the Quick Pop stick and rotate clockwise until the pop loosens. Unscrew the Super Tool by rotating counterclockwise while the pop is still in the mold cavity. Then lift out the pop and enjoy!
Make Unique Quick Pops
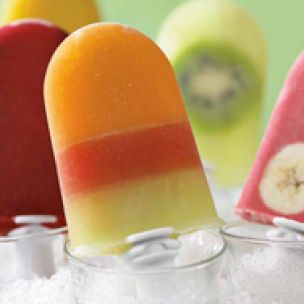
The Zoku Quick Pop Maker allows you to prepare all kinds of unique creations very quickly. To make a Zebra Pop like the one on the left, add one ingredient at a time. Wait until the first flavored juice has frozen (about 5 minutes), then add the second ingredient; after another 5 minutes, add the third. Alternate ingredients up to the fill line.
To create a Flavored Core Pop, fill a shell flavor up to the fill line and waiting 1 to 2 minutes for it to freeze. Suck out the remaining liquid with the suction tool, then pour in the core flavor and wait for the pop to freeze completely.