


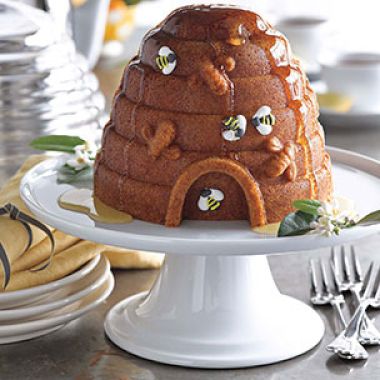
Make your celebration one to remember with a showstopping 3-D cake, whether it’s in the shape of a sweet-as-honey beehive, an autumnal apple, a spooky skull for Halloween, an adorable snowman or an Easter bunny. All you need to pull it off is one of our easy-to-use nonstick pans plus a few everyday baking essentials. Though the process is easy, it’s best to remember these basic tips when assembling 3-D cakes.
Use the right batter
Because 3-D cakes have to balance on a smaller base than your typical cake, they need to be made with a batter that is sturdy enough to keep the cake from crumbling. We provide a recipe for an appropriate batter with each 3-D cake pan we sell, and you can find the recipes on our website too. If you decide to experiment with your own recipes, try using pound cake or Bundt cake recipes rather than ones for lighter cakes such as sponge cake or angel food cake.
Fill the pans correctly
Fill each well of the pan about 3/4 full of batter so that the cake will fill the entire well once it rises. Spread the batter so the sides are slightly higher than the center; this will help ensure that all the pan details will be visible in the finished cake.
Let the cake cool completely
A warm cake is less sturdy and will melt the buttercream frosting that you need to hold the cake halves together, so don’t rush the process. Let the cake halves cool completely before you assemble them.
Level the cake halves
Before assembling the two halves of your 3-D cake, you need to make the edges of the cake even so that they will adhere together properly. The easiest way to do this for most 3-D cakes is to return the cooled cake halves to the pan, then use a serrated knife to gently saw off the part of each cake half that rose above the edge of the pan, using the pan itself as your guide for your knife. However, for 3-D cakes that are glazed while they are still warm, you will need to trim the cakes level without the pan to guide you.
Assemble the halves
For each cake pan we provide a recipe for a quick buttercream frosting that can be used to adhere the sides of the cake together. Once you have “glued” the two halves together using the frosting, it is best to refrigerate the cake for about 30 minutes, if possible. This causes the buttercream to harden and will help the cake stick together.
Decorate the cake
One of the great things about our 3-D cakes is that they look great even when they aren’t decorated, so you can serve them as is or simply sprinkled with a confectioners’ sugar immediately before serving. Or, you can go all out and pipe buttercream frosting or royal icing all over the cake to decorate it however you like. For a dramatic cake without spending a lot of time with a pastry bag, consider making a white or chocolate glaze to cover the cake, then coating the sticky glazed cake with colorful sanding sugar.