


Before carving any roasted bird, let it stand at room temperature for at least 10 minutes, or 20 minutes for a larger bird. It will not get cold, and the rest period allows the juices to redistribute evenly throughout the flesh. If the kitchen is cold, tent the chicken with aluminum foil. For best results, carve with a sharp knife with a long, slender blade, especially needed for slicing the wide breasts of large birds, and a meat fork to support and secure the bird. Basic steps in carving a chicken are shown here.
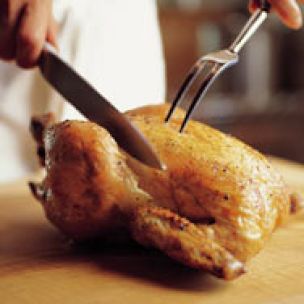
1. Removing the leg: Set the chicken, breast up, and cut through the skin between the thigh and breast. Pull the leg away from the body to locate the thigh joint, then cut through the joint to remove the entire leg.
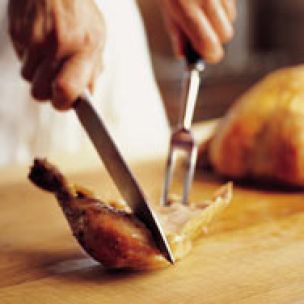
2. Carving the leg: If the chicken is small, serve the whole leg as a single portion. If it is larger, cut through the joint that separates the drumstick from the thigh. To carve a thigh, cut off the meat in thin slices parallel to the bone.
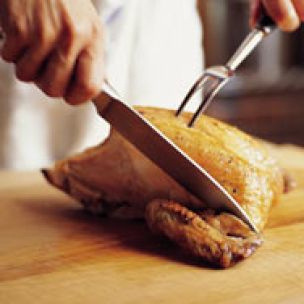
3. Removing the wing: Cut through the skin between the wing and breast and pull the wing away from the body to locate the shoulder joint. Cut through the joint to remove the wing.
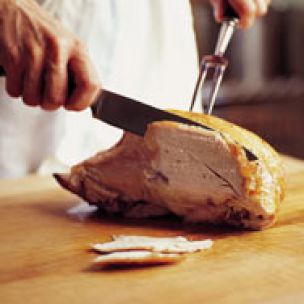
4. Carving the breast: Just above the thigh and wing joints, carve a deep horizontal cut through the breast toward the bone, creating a base cut. Starting near the breastbone, carve thin slices vertically, cutting downward to end each slice at the base cut.
Adapted from Chicken, by Rick Rodgers (Simon & Schuster, 2001)