


A saltwater mollusk with slightly pointed shells, mussels range in color from blue-green to yellowish brown to inky black. They have cream to orange-colored meat that is sweeter than that of oysters or clams. Mussels are an excellent buy, too, since they generally are less expensive than other shellfish.
The majority of the mussels available in the marketplace today are cultivated. Although there are dozens of different species, the two mostly widely available are the Atlantic blue or common mussel and the Pacific green-lipped or New Zealand mussel. The blue mussel, which is actually quite black, is 2 to 3 inches long. The green-lipped mussel is larger, 3 to 4 inches long, but its meat is also tougher.
Selecting
Buy live mussels from a reputable fishmonger. They should have a fresh sea smell, with no trace of ammonia. Tap the mussels and do not buy them if they stay open, indicating a dead or at least dehydrated mussel. To cut preparation time, look for already-shucked and cooked mussels chilled in the seafood section or freezer case of your supermarket. Already-shucked mussels are also available frozen, and occasionally mussels can be found frozen on the half shell. Mussels are also available smoked and canned.
Smaller mussels are best for steaming, while the larger ones lend themselves to stuffing, broiling and grilling.
Mussels are susceptible to water contaminants and "red tides" of poisonous plankton. Before collecting your own mussels, be sure to read posted signs and check with local health or game agencies.
Storing
Remove live mussels from their packaging, place them in a bowl, cover them completely with a moist kitchen towel and refrigerate. Dampen the towel if it dries out during storage. Since they also need air, do not cover mussels with water or seal them in a plastic bag. Fresh mussels are best if used as soon as possible; keep them for no more than 1 day. To freeze, place live mussels in a zippered plastic freezer bag and store for no more than 3 months. Defrost frozen mussels slowly in the refrigerator before cooking.
Preparing
Scrub grit off the shells of fresh mussels with a stiff-bristled brush, then debeard each mussel, as needed. Remove the beard, the little tuft of fibers the mussel uses to connect to rocks or pilings, by cutting and scraping it with a knife or scissors. You may also pull it sharply down toward the hinged point of the shells with your fingers, but this tends to pull away a bit of the meat, so many cooks prefer to cut it.
Do not debeard mussels more than 1 hour before cooking, since doing so kills them. All mussels used to come with a very tough beard, but today farm-raised ones have hardly any beard, making cleaning them less of a chore.
While cleaning them, discard any mussels that are very light as they are likely dead, or any that are heavy with sand. Remember that live mussels will close tightly, if a little slowly, when touched. If in doubt, try twisting the shells sideways in opposite directions, as if unscrewing a bottle cap. The shells of dead mussels will break apart easily. The mussels should open up again after cooking. Check cooked mussels and discard any that failed to open.
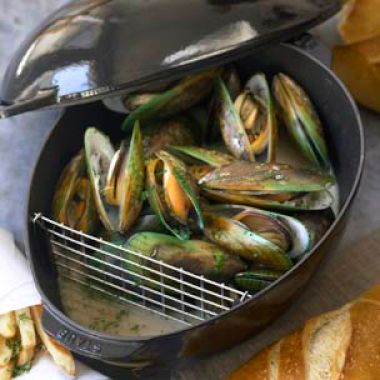
To shuck mussels, or remove the shells, steam them with 1 inch of liquid for 2 to 3 minutes, just until they loosen and open slightly. Using a small knife—preferably one designed for shucking clams—pry open the shells and cut the meat away. Reserve the steaming liquid to use in the sauce.
Adapted from Williams-Sonoma Kitchen Companion: The A to Z Guide to Everyday Cooking, Equipment and Ingredients (Time-Life Books, 2000)