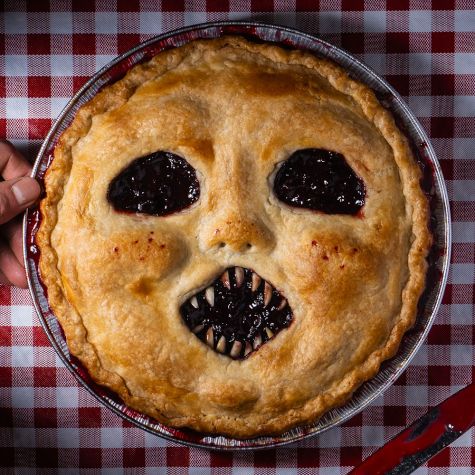
Scary Cherry Pie
With crimson filling the cherry face cries, doomed by its devouring fate. It’s truly the creepiest of cherry pies, with a face that only its mother won’t hate.
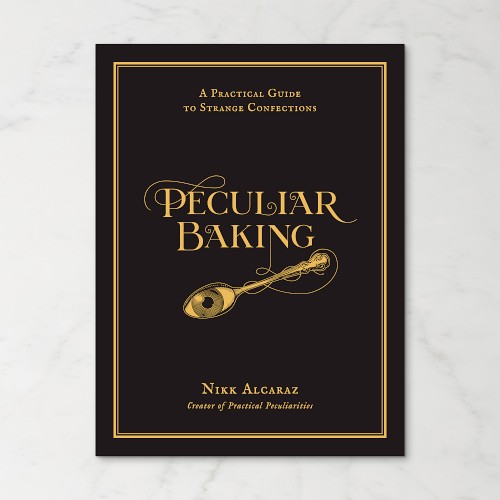
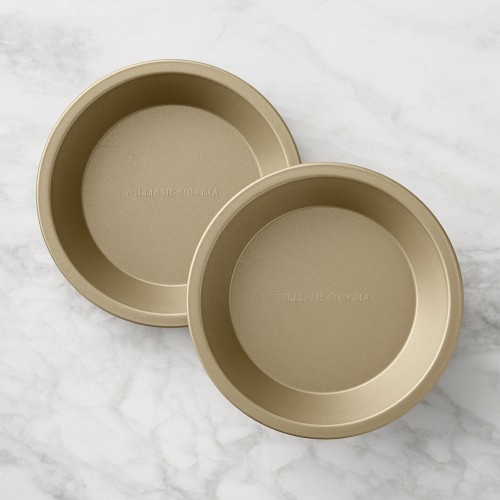
For this pie, it’s best to use an aluminum pie pan for aesthetics and because they conduct heat better than ceramic or glass pans, says Nikk Alcaraz, creator of the channel Practical Peculiarities and author of Peculiar Baking, where the recipe appears. This will result in a crisp and sturdy base for the pie. The secret to pie is all in the crust, he explains. Keeping it cold is truly a must. With gentle hands this dough should be mixed, but overwork and it will go unfixed.

Ingredients:
For the flaky pie crust:
- 3 cups (12 oz./375 g) all-purpose flour, plus more for dusting
- 1 tsp. kosher salt
- 1 Tbs. sugar
- 1/2 cup (3 1/3 oz./96 g) Crisco vegetable shortening
- 12 Tbs. (1 1/2 sticks) (5 1/2 oz./170 g) cold unsalted butter, cubed
- 1 tsp. apple cider vinegar
- 5 to 7 Tbs. (3 to 4 fl. oz./80 to 110 ml) ice-cold water
For the cherry filling:
- 2 lb. (907 g) frozen sweet dark cherries, pitted
- 1/3 cup plus 1 Tbs. (2 3/4 oz./80 g) sugar
- 1/4 tsp. grated lemon zest
- 2 Tbs. fresh lemon juice
- 1/2 tsp. kosher salt
- 1/2 tsp. ground ginger
- 3/4 tsp. almond extract
- 1/4 tsp. vanilla extract
- 2 Tbs. unsalted butter
- 1/3 cup (2 3/4 oz./80 g) maraschino cherry syrup (from the jar of cherries)
- 1/4 cup (1 1/4 oz./35 g) cornstarch
3 Tbs. panko bread crumbs- Milk for brushing
- Slivered almonds for teeth
- Vanilla ice cream for serving (optional)
Directions:
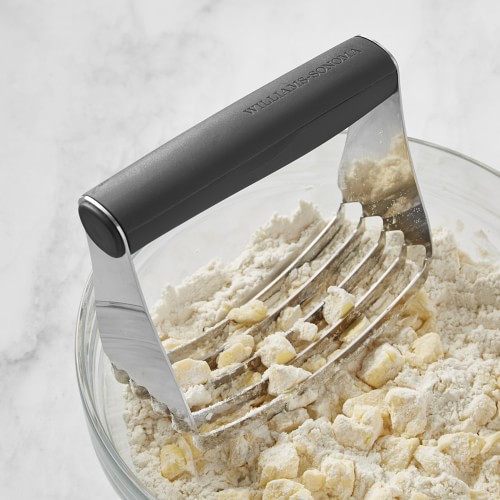
To prepare the pie crust, in a large bowl, whisk together the flour, salt and sugar until combined. Add the vegetable shortening and butter in scattered pieces on top of the flour.
Using a pastry cutter, cut in the shortening and butter until the mixture resembles coarse meal. Gently sift the mixture through your fingers to break up any larger chunks. It should have various sized chunks of butter remaining, but the largest pieces should be no bigger than the size of a pea.
Add the vinegar and water and mix gently with a rubber spatula until the flour has absorbed the water. Do not overmix; the mixture is supposed to be shaggy. It will look like many sizes of crumbly chunks that are not formed together into one dough ball.
Dump the dough crumbs onto a clean surface and gather the dough together into a dome. It should look like a brain. Cut it in half and wrap each piece in plastic wrap. Pat each into a disk and chill in the refrigerator for 1 hour. The most important part while working with this crust is keeping it cool or else it will become difficult to handle. Patience is key. This crust can be prepared ahead and frozen for up to 6 months.
To make the cherry filling, in a large pot over medium heat, combine the frozen cherries, sugar, lemon zest, lemon juice, salt, ginger, almond extract and vanilla. Bring to a simmer until the cherries are thawed and their juices come to a rolling simmer, 7 to 10 minutes. Add the butter and stir until melted, then bring it back to a simmer. In a small bowl, combine the maraschino cherry syrup and cornstarch to create a slurry. Add it to the simmering pot and stir constantly until the mixture becomes as thick as jam. Remove from the heat and pour the filling onto a parchment-lined baking sheet. Spread it in a single layer to cool completely.
Meanwhile, prepare the crust: Working with one pie disk, lightly flour a piece of parchment paper and a rolling pin. Roll the dough out to 1/8-inch (3-mm) thickness. Fold the dough onto itself in half vertically and then horizontally to get four layers. Roll it out one more time into a rough circle. Sprinkle 1 1/2 Tbs. of the bread crumbs on the bottom of a 9-inch (23-cm) pie pan. Transfer the dough by turning it over with the parchment paper into the pie pan. Peel off the parchment paper and fold the excess dough under itself to make the rim of the crust. Crimp the edges, if desired, and place the pie pan in the freezer until it is solid, about 20 minutes. Freezing the pie crust will prevent it from getting soggy during baking.
The face: A few things before we begin. Just like people, each face will look different. Pie dough is a finicky material that shouldn’t be overworked. Just let the dough do what it will. The goal is to get a scary face, so trying to make it look pretty is pointless. This pie crust is easier to work with when it’s cold. If it gets too soft or springy, wrap it up and allow it to relax in the freezer for 15 minutes. With that said . . .
Using the second pie disk, lightly flour a piece of parchment paper and roll the dough out. Fold the dough in half vertically and then horizontally to get four layers. Roll it out one more time into a rough circle. Roughly measure a circle 1 inch (2.5 cm) larger than the diameter of the pie pan. Cut out the eyes and mouth with a paring knife. Slide the face with the parchment paper onto a baking sheet and refrigerate until needed.
To create the features on the face, cooked pieces of pie dough will be placed under the main face to create dimension on the nose, cheeks and brow bone.
Preheat an oven to 425°F (220°C).
Estimate where you’d like the dimension of the face to be and sculpt them out of the excess dough on a parchment-lined baking sheet. Remember to make them a bit thinner than you would expect because they will expand a bit during baking. Freeze for 15 minutes, then bake until golden brown, 10 to 12 minutes. Let them cool. Keep the oven set at 425°F (220°C).
Carefully place the baked pieces under the uncooked pie face and gently sculpt them into place. Freeze the face for 15 minutes more to firm up.
Meanwhile, sprinkle the remaining 1 1/2 Tbs. bread crumbs on the bottom of the frozen crust in the pie pan. Add the cooled cherry filling and spread it flat.
Once the face has chilled, gently peel it off the parchment paper and place it on top of the cherry filling. Trim any overhang so that the face fits perfectly within the walls of the bottom crust. Don’t crimp the edges of the face to the bottom crust. The gap between will allow the filling to bubble over and enhance the gore factor. The more deformed and cherry splattered, the better.
Poke nostril holes with a skewer or toothpick and chill the whole pie in the freezer until solid, about 15 minutes more.
Brush the top of the pie with milk and place the pie on the lowest rack of the oven. Bake for 20 minutes, then reduce the heat to 375°F (190°C) and bake for 1 hour and 10 minutes more. Move the pie to the top rack during the last 10 minutes of baking. It is done when the crust is golden brown and the filling starts to bubble. If the face is browning too quickly, lightly tent it with aluminum foil halfway through baking.
Remove the pie from the oven and let it cool for about 4 hours before cutting into it. This will give the filling time to firm up. Add slivered almonds in the mouth to imitate teeth. Serve with a scoop of vanilla ice cream. Oh, and don’t be scared. It’s just cherry pie.
Store the pie covered at room temperature for up to 2 days. Makes one 9-inch (23-cm) pie.
Reprinted with permission from Peculiar Baking by Nikk Alcaraz (Page Street Publishing Co., 2024). Photo credit: Weston St. James.
Recommended Products
-
$35
-
$49.95
-
$47.95
-
$25.90
-
$19.95
-
$24.95
-
$79.95
-
$78.95
-
$22.95