


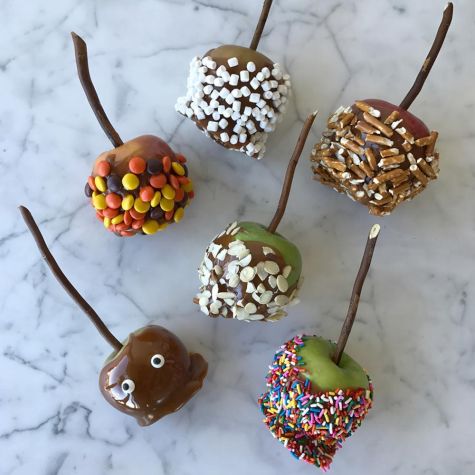
Caramel Apples
A super way to celebrate the arrival of cooler weather, making caramel apples is a great project for the family on a fall weekend, and the sweet treats are perfect for serving at Halloween. While a caramel apple is irresistible on its own, make yours Pinterest-worthy by adding some fun toppings. We especially like salty additions like nuts and pretzels since they contrast nicely with the tart apples and sweet caramel, but you can also use crushed candies and cookies, shredded coconut or marshmallows. It’s important that your apples are free of wax or the caramel will slide right off. If you can, purchase unwaxed apples, available at most farmers’ markets. But if yours are waxed, no worries; just remove the coating by following the instructions below.

Ingredients:
- 8 to 12 small crisp, tart apples, such as Granny Smith, Pink Lady, Braeburn or Jonagold
- Unsalted butter or nonstick cooking spray
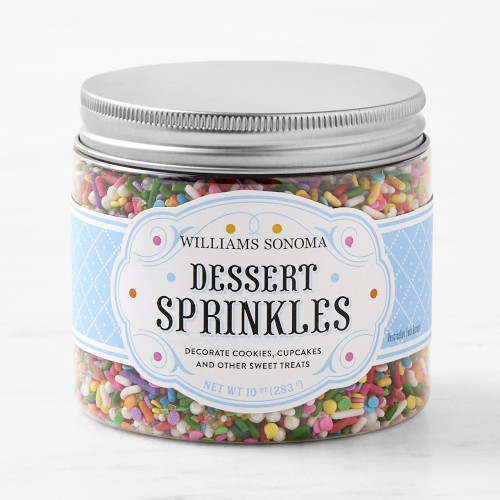
- Assorted toppings, such as sliced or chopped salted nuts, crushed pretzels and colorful sprinkles (optional)
- 1/4 cup (2 fl. oz./60 ml) water
- 1 1/2 cups (12 oz./375 g) sugar
- 3/4 tsp. kosher salt
- 1 cup (8 fl. oz./250 ml) heavy cream
Directions:
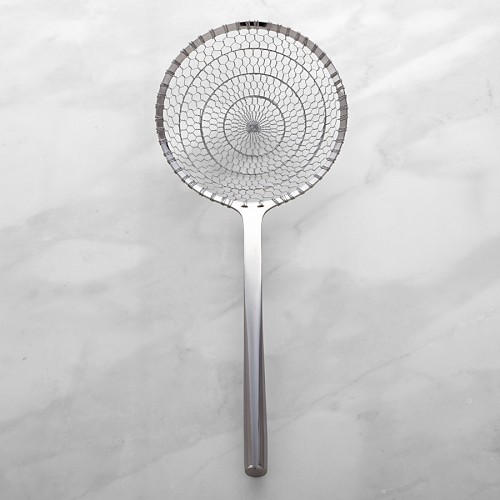
If your apples are waxed, bring a large pot of water to a boil. Using a spider or a large slotted spoon, dip 1 apple at a time into the water, removing it after 5 seconds—and no longer. Carefully use paper towels to vigorously rub the apple and remove the wax.
Insert an ice pop stick into the stem end of each apple. (Alternatively, use wooden chopsticks or decorative twigs or branches, available at craft stores and many garden stores.) Refrigerate the apples for about 30 minutes (a cold apple will cool the caramel as it goes on, which will help it stick better).
Line a baking sheet with parchment paper. Generously butter the parchment or spray it with nonstick cooking spray. Don’t put the apples on the baking sheet until you have dipped them, or the butter will prevent the caramel from sticking.
Remove the apples from the refrigerator and wipe each one with paper towels to make sure they are thoroughly dry. Place them on the work surface next to where you will be dipping them. Put each topping in a shallow bowl. Have the caramel ingredients measured and set them next to the stove.
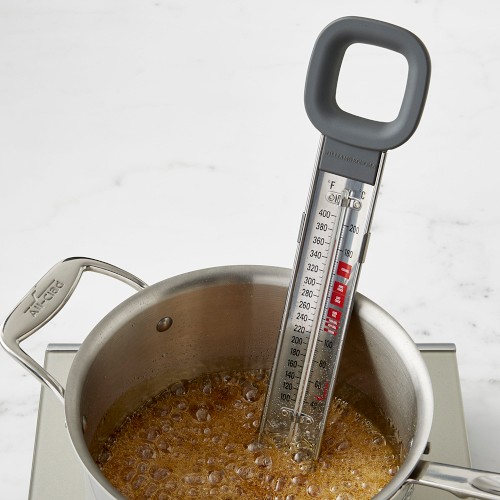
Attach a candy thermometer to the side of a 3- or 4-quart (3- or 4-l) stainless-steel saucepan. Combine the water, sugar and kosher salt in the pan and set over medium heat. Bring the mixture to a boil, stirring occasionally. As soon as it comes to a boil, stop stirring; otherwise, crystals may form on the edge of the pan. Continue cooking until the liquid starts to darken, 7 to 10 minutes.
Watch very carefully for the precise moment that the sugar turns an amber color, the color of an old copper penny. The candy thermometer should register about 350°F (180°C), but watching the color of the sugar is more important than watching the thermometer. This is the stage when the sugar has taken on a rich, toasty flavor. Once you go past this point, the sugar will blacken and taste burnt. If that happens, toss the sugar and start over.
Exactly when the sugar turns amber, wearing oven mitts, carefully add the cream to the sugar and stir until thoroughly combined. (Be careful because the mixture will bubble vigorously and may spatter.) Continue cooking, stirring, until the thermometer registers 240°F (115°C). If you take it off sooner than this, the caramel will still be delicious, but it won’t be thick enough to coat the apples without sliding off, so be patient.
Remove the pan from the heat and let the caramel cool slightly, until it registers about 212°F (100°C), 3 to 5 minutes. The caramel will thicken slightly as it starts to cool. Using mitts, carefully transfer the caramel to a bowl. (It’s much safer to dip the apples into a bowl because it would be very easy to burn yourself on the hot saucepan.)
Dip each apple into the caramel, swirling it to coat thoroughly and getting the caramel as close to the stick without touching it as you can. Let the excess caramel drip back into the bowl, then put the apple, stick side up, on the parchment-lined baking sheet. Work carefully but quickly before the caramel becomes too firm to coat the apples. Dip all of the apples before you start adding the toppings.
Using your hands, carefully press the toppings into the caramel to make sure they adhere. Return the coated apples to the baking sheet. If possible, refrigerate the apples on the baking sheet until ready to serve. This will also help the caramel stick to the apples and prevent it from pooling at the bottom. The caramel apples will keep, covered, in the refrigerator for up to 3 days. Makes 8 to 12 caramel apples.
Williams Sonoma Test Kitchen
Recommended Products
-
$19.95
-
$24.95
-
$49.95
 (304)
(304)
-
$74.95
-
$179.95
 (6)
(6)